Showing posts with label Update. Show all posts

Facebook: how to stop receiving updates on your wall, without breaking the friendship

face-likeFacebook: how to stop receiving updates on your wall, without breaking the friendship - Perhaps not everyone knows this function, but you can stop receiving updates from friends and relatives on Facebook, without the person knowing. Currently, I have seen many people complaining about other people's posts on Facebook and I think every one should post what you will, but ..... stop following a friend or relative can be a little embarrassing, leading to family conflicts. 


If you want to get rid of the publications of someone without having to stop following that person - what is called in Facebook "undo friendship" just knowing configure what should appear on your wall, in "news feeds." 
Guinea pig, I'll get the profile of our former columnist, Luan Felipe: 


fecabook-perfil


In the new timeline, clicking the "friends" appear several options. If you do not want to receive more NO-related update boring friend, simply uncheck the "show in the news feed." 
If you want to select the updates that will appear on your wall, click on "settings" and choose from the options available: 


face-feeds
As you can see, I subscribe to the posts straight Luan Smiley flashing
Another way to limit the publications of several people at the same time, putting them in the "known".In this case, we receive the updates, but with little frequency. Go to "start page" in the left column and click on "Friends" (until the other day it was called "list", but Mark Zuckerberg loves change ...). Click on 'known' 


facebook-listas
On the right side, you will see the option to add everyone you want 


conhecidos-facebook
My "known" will stay a secret hehehe. And yet the facebook suggests who can put on that list. Get to work! Cheerful

Creating Related Posts with Thumbnail


related-post

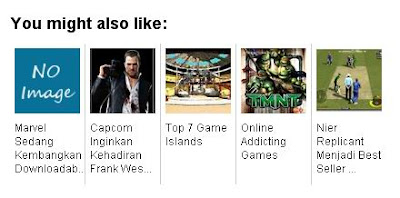
Previously I've been posting about how to create a related post to display a list of post titles related to the main post. Making it easier for readers to find related topics.To learn more about related post read here . Well this time I want to discuss how to create a more interesting related post is by adding a thumbnail or picture in it .To be more clear the picture below. Interesting is not it? 
This method can be used in conjunction with a related post without thumbnail.
 For those of you who are interested to set it up, follow these steps: 

1. Open the menu Design -> Edit HTML
2. You can check the "Expand Widgets Templates" 3. Put the code following the above </ head>


<!--Related Posts with thumbnails Start-->
<!-- remove --><b:if cond='data:blog.pageType == &quot;item&quot;'>
<style type='text/css'>
#related-posts {
float:center;
height:100%;
min-height:100%;
padding-top:10px;
padding-left:15px;
padding-right:15px;
}

#related-posts h2{
font-size: 1.3em;
color: black;
font-family: Arial;
margin-bottom: 0.75em;
}

#related-posts a{
color:black;
}

#related-posts a:hover {
background-color:#eeeeee;
}
</style>
<script type='text/javascript'>
var defaultnoimage="https://blogger.googleusercontent.com/img/b/R29vZ2xl/AVvXsEgr8IVqGSSpq_wyjyYy6mnRTwD9g7gBxgYledyeQHLb1R3PwklH8GqWu4DvX4rVgueDgrkyHVSGB8utlNJveMV-6GEMeY7d-CsS9PTAHD54J6gihxAkT6oENGOdoJadLj18WasqxYBcN1EC/";
var maxresults=5;
var splittercolor="#cccccc";
var relatedpoststitle="You might also like:";
</script>
<script src='http://hbhost.googlecode.com/files/related-posts-with-thumbnails-for-blogger.js' type='text/javascript'/>
<!-- remove --></b:if>
<!--Related Posts with thumbnails End-->

4. Then look <p class='post-footer-line post-footer-line-1'/>

5. If not found try searching for post-footer-line

6. Put the code follows below.

<!-- Related Posts with Thumbnails Code Start-->
<!-- remove --><b:if cond='data:blog.pageType == &quot;item&quot;'>
<div id='related-posts'>
<b:loop values='data:post.labels' var='label'>
<b:if cond='data:label.isLast != &quot;true&quot;'>
</b:if>
<script expr:src='&quot;/feeds/posts/default/-/&quot; + data:label.name + &quot;?alt=json-in-script&amp;callback=related_results_labels_thumbs&amp;max-results=6&quot;' type='text/javascript'/></b:loop>
<script type='text/javascript'>
removeRelatedDuplicates_thumbs();
printRelatedLabels_thumbs(&quot;<data:post.url/>&quot;);
</script>
</div><div style='clear:both'/>
<!-- remove --></b:if>
<!-- Related Posts with Thumbnails Code End-->

7. If it Save your template. Specification: var images that appear on postings that do not have a picture. You can replace the image with another image . maxresults var = indicate the number of posts that appear on the related post. Please set the number of posts that would appear to change the number . splittercolor var = "#cccccc shows color dividing line. Replace cccccc with code color you want.relatedpoststitle var = " You might also like: show related post titles. Replace the red text with the title you want. those of you who feel the way the above is too difficult, you can use the related post with thumbnail widget provided bylinkwithin.com . For installation very easy way, here are the steps: 1. Go towebsite http://www.linkwithin.com 2. Fill in the required data on the form that has been provided


Email : Your email address Blog link : Video blog where you install the related posts widget with thumbnail Platform : select Other Width : choose the number of related posts that would appear


You can check the little box if you are using a background template, dark 3. ClickGet Widget 4. Copy and paste the code script given above </ body> on your blog template and save your template. Finish If there are less obvious or experience difficulties in installing related post with thumbnails please leave your comment below. I will try to help you.

Download Alexa Booster

Alexa Booster - To increase the page rank and SEO of a blog can use a variety of tricks and how, to use banklink booksmark blog or social qualities of having good PageRank and dofollow. for novice blog or blog which makes it somewhat difficult to increase blog traffic, so it must be a lot of effort to advertise this blog and blog traffic so be good. 


Download Alexa Booster

Download Alexa Booster


No need to worry for beginner bloggers to increase traffic to blog because here hasbihtc.blog will provide tricks to increase blog traffic quickly. not have many visitors, because this softwere our blog will have high traffic and of course from various proxies.


Download Alexa Booster


Directly be ok. softwerenya name is " Alexa Booster ". softwere with this blog we can have high traffic. we just live our blog address and wait until the process is complete.


Download Alexa Booster

Download Alexa Booster


softwere can be downloaded free of charge from your service provider or download alexa driving here to get the softwere. advantage of this softwere able to rapidly increasing traffic various proxies , and IP .

I use it quite easily. 
- Install the application as usual 
- Enter the address of the blog or wibesite
- Follow the instructions 
- Wait until the process is complete


Nb. For bloggers who do not know what it is Alexa Booster or usefulness Understanding Alexa Rank and few tips from my hasbihtc.blog on Download Alexa Booster may be beneficial yours respectfully happy blogging.

Copyright © : http://hasbihtc.blogspot.com/2012/02/download-alexa-booster.html#ixzz28UlKRdeo

A Blogger Blogspot blog publicly


Where to Blogger Blogspot Blog for a change it to "public"? How can you make a Blogger Blogspot blog "public"? Where one has at Blogspot the settings that all can read the blog?

By default, all Blogger Blogspot blogs are for creating publicly available, which means that from now on everyone can read along to the writing.

It is the first blog to have been registered at Blogger.com, recommended anyway, a second (test) blog. Especially the test blog should be set to "non-public" and test drive of all features once. For example, writing some posts, upload pictures and videos to try, try out the template designer, etc.

Of course, it is possible to Blogger access to "non-public" limit. It is also possible to only selected people to make the contents public, they may be more blog authors or invited by someone "intended" guests.

One has his blog once "non-public" set to, for example, because you perhaps only wanted to create some content or you just do not find the settings option to the blog "public" do, then proceed as follows:

Blogger Blogspot blog to make "public" - old Blogger interface:


  • blogger.com sign in, go to the corresponding blog
  • Settings >> Permissions >> Blog >> readers who can access this blog? >> Hook at all
  • It appears this message: "You are going to allow all users to read the blogs." And confirmed with "Allow All", and the blog is now open for all readers


Blogger Blogspot Blog öffentlich machen.


  • To test the success of the setting, one logs in from short (because you can read their own blog yes) and then calls his blog. You should also be no more messages appear to login to the blog is therefore publicly available for other readers.

Blogger Blogspot Blog öffentlich machen


Blogger Blogspot blog to make "public" - new Blogger interface:

blogger.com sign in, go to the corresponding blog
Settings >> Basic >> Permissions >> blog reader >> "Only blog authors" or save "only these readers" Edit >> hook with all changes >>


Blogger Blogspot Blog öffentlich machen.


  • To test the success of the setting, one logs in from short (because you can read their own blog yes) and then calls his blog. You should also be no more messages appear to login to the blog is therefore publicly available for other readers.

Blogger Blogspot Blog öffentlich machen.


Create a facebook step by step, learn here


Create a facebook is simple, this is more a basic tutorial focused on readers who have little or no knowledge in internet. Today teach in detail to create a facebook, is easy and quick c'mon.
Step 1 -   To create a facebook, you must first access the same page at the following address: https://www.facebook.com , done that soon you will see in the right corner of the page the part of registration, as the picture below :
criar-um-facebook
Fill in the registration exactly as requested, in the first field name, your last name in the second, third your email (do not forget you must use a valid email), the fourth field repeat email typed above, the fifth pick a password (do not forget to note it or store it in memory as well as you will need every time you get into your facebook), the next field you put your sex followed by your date of birth. After completing all fields click sign up, just below and go to step 2.
Step 2 - After clicking sign up you'll see a screen with 3 steps, the first one you can exchange the chosen mail in registration and invite to be part of your facebook profile, your friends from hotmail, msn and other types of email you use, configure and invite your liking finished skip to step 2.
In the second step you should fill in some information about him, after fills them or not, go to the third step clicking save and continue.

In the third step you can choose the photo you want to use the profile of your facebook account, you can choose a photo that is already on your computer or even take a time with your webcam if any, done that click save and continue.
Step 3 - I have great news, your profile is ready for use, it said it was simple to create a facebook ? But just one more simple step, note that when you clicked save and continue in the third stage you were automatically redirected to your newly created facebook page, above note on the page that has a message like the image below:
criar-um-facebook
When you see this message, click on it where it says "go to your email," by doing this you will be redirected to the page provider of your email, enter the email account you entered in step 1 of tutorial. After doing so, the inbox of your email you will see two messages from facebook, the first of which will be a welcome message and the second e-mail for registration and activation is the one that interests us, click on the link inside the e-mail and done, your facebook account is created and activated.
Note: Do not forget that whenever you want to join your facebook account, your login is your email.
Just here for the tutorial Create a facebook, I hope it was helpful to all of you, any questions or information exchange await the comments, hugs to all.

Searches that led to this article:

  • how to create a facebook walkthrough
  • sign up for facebook step by step
  • criar facebook facil
  • Join facebook
  • criar facebook